Windows Machines
Guest Installation
CAREFULLY WRITTEN AND CAREFULLY CHECKED
I was trying to make a windows 11 VM on my fedora host. After lots of headache with qemu, quickemu, virtmanager etc, I finally found this which worked for me. Thank you. @YehiaEhab17 - issue #11
FROM qqX 1.14 ONWARDS, THE INSTALLATION STEPS HAVE NOW BECOME AUTOMATED
Creating Windows Virtual Machines is fairly straightforward but there are some quirks to pay attention to:
- Read the sections on TPM, Secure Boot and on Hardware records
TPM & Secure Boot
If you haven't installed swtpm then see the tpm notes
Secure Boot is controlled in the .conf file. The qqX autotune routine will set this up for you.
This was previously better as set to 'off' but newer 2025 installations and updates are now needing this set to 'on'
Mkisofs
The Quickemu installer uses mkisofs for the 'unattended' auto-build ISO.
See the general qqX installation notes if this is causing problems. Or, as a retro-fix, try:
mkisofs -J -R -input-charset utf-8 -o "unattended.iso" "unattended/"
from a terminal opened in the Windows VM folder.
Guest Virtual Hardware
Remember that Windows is proprietary software and has copy controls.
The hard metal rules still apply. If too much hardware changes at once, then Windows will not load.
qqX will record the virtual hardware that Windows uses in a log file, in case you need it. The record can be upated via the utils menu, if you make any big changes.
In case of lock-out, the easiest path is to apply an older snapshot but you can also use the hardware record as the basis of a custom boot file.
For Windows guests:
From qqX 1.14 onwards, the needed drivers and agents will ALL auto-install and everthing should already be in place
-
You may have to adjust the display settings for size and scaling ratio
-
Do NOT download the Spice guest tools as they are out of date.
See the qqX docs for Notes on Shared Drives and qqX exclusive sharing features
Downloader
qqX still offers Windows downloads that are not available upstream. Quickemu changes to the 'editions' code in early 2025 did help but they are not complete.
Version 1.12 introduced download resuming. This will work with Microsoft and can be very useful if you have an poor internet connection. You will are only allowed one (or two?) resumes per time-out session but you should still be able to eventually download everything.
Installer
FROM qqX 1.14 ONWARDS, THE INSTALLATION STEPS HAVE NOW BECOME AUTOMATED
Trouble-shooting for Quickemu/Quickget and older qqX installs
-
MAKE SURE to follow up the installation by running
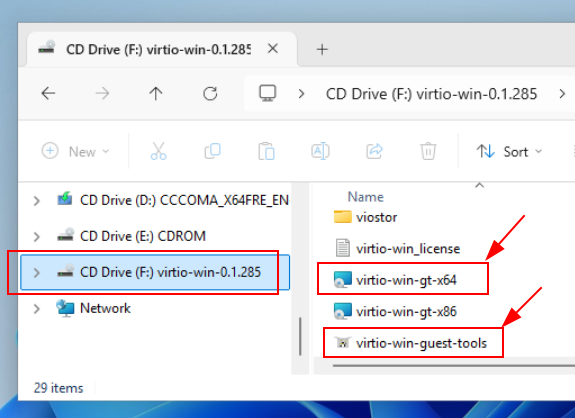
virtio-win-gt-x64.msiwhich is on the virtio ISO, from inside Windows -
MAKE SURE Windows finds the initial drivers by following the pictures in the archive section
-
Install the Virtio guest tools which are also on the ISO.
-
Do NOT download the Spice guest tools as they are out of date.
Archive screenshots and notes for pre qqX 1.14
qqX has an option to check and view the Qemu 'invocation' before booting, as shown in following picture
- use the [v] option from the main menu to set 'verbose mode'
Quickemu will send a key press signal, via socket sendkey, to trigger the CD 'press any key' request.
The first dialog screen that you see should ask you to confirm a language:
For qqX 1.12 and 1.13, you will be taken to an installer 'location' screen where will need to click on the blue 'find hardware' text link:
Click on 'Browse' and select the Virtio DVD
Select amd64 and w11, or as appropriate
Click on the driver. In this screenshot 'viostor.inf' and then click install.
Everything should then proceed:
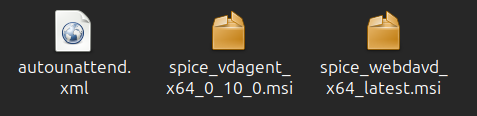
Quickget may have downloaded another CDROM/DVD (ISO) which will contain the Spice guest msi's
-
The additional SPICE guest tools are OUT OF DATE and should NOT be used
-
Use the additional Virtio guest tools instead, which are maintained
For qqX 1.12 and 1.13, the basic tools should normally have been installed via the automated unattended.iso
- MAKE SURE to have followed up the installation by running
virtio-win-gt-x64.msiwhich is on the virtio ISO
Host Problems
Distros using Apparmor
- For swtpm: Could not open UnixIO socket: Permission denied, see the tpm notes